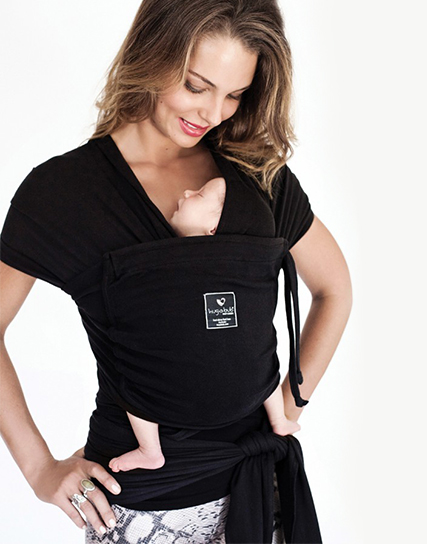
IMPORTANT - Until baby is secured inside the carrier, always use one hand to safely support infant
Below you can find these instructions in a print friendly manner:
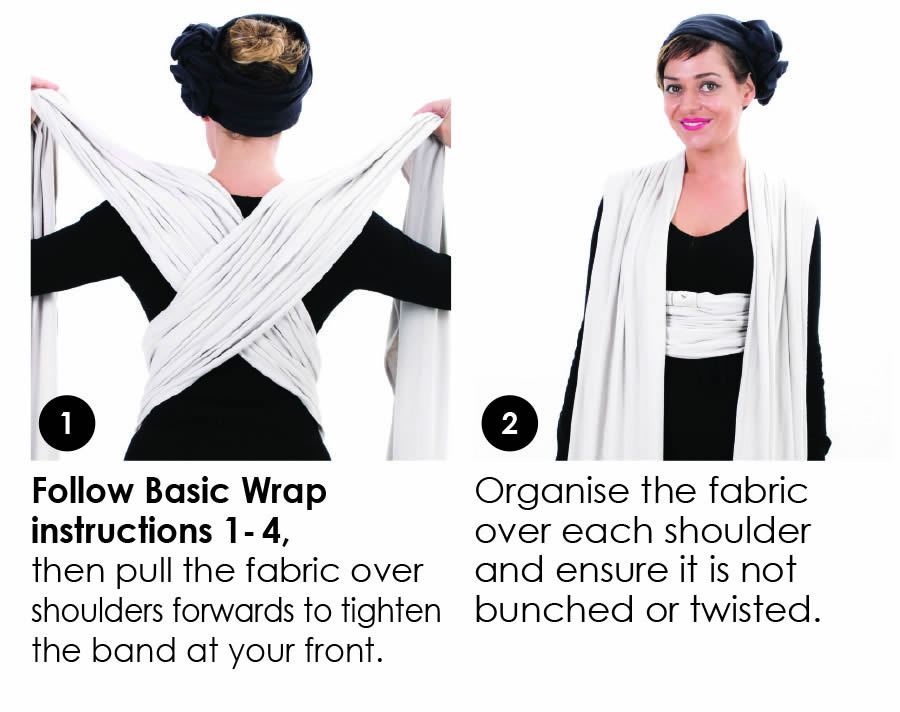
- Follow Basic Wrap instructions 1 - 4, then pull the fabric over shoulders forwards to tighten the band at your front.
- Organise the fabric over each shoulder and ensure it is not bunched or twisted.
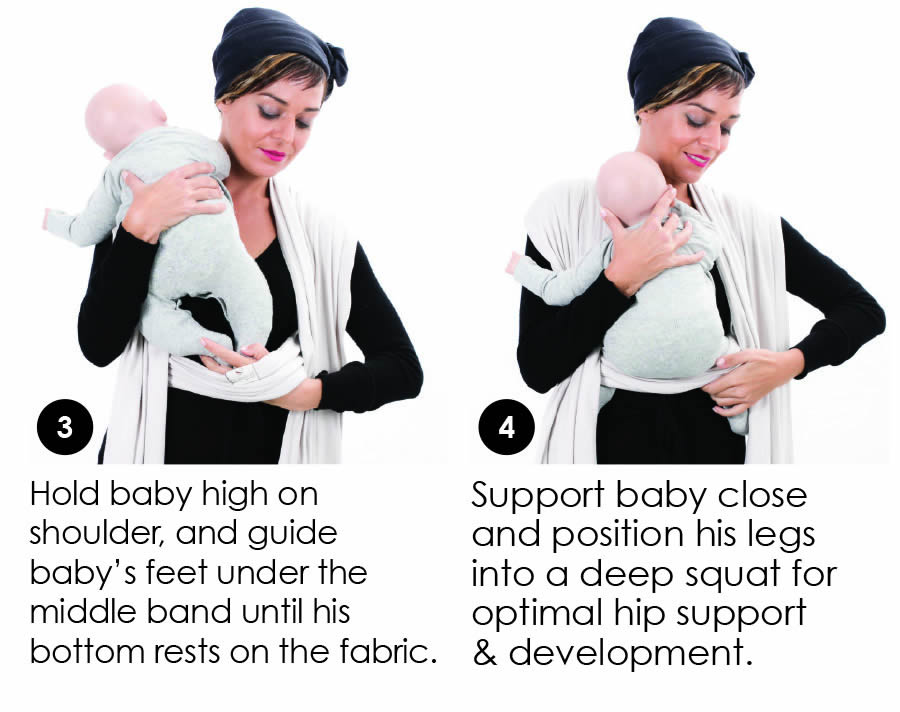
- Hold baby high on shoulder, and guide baby's feet under the middle band until his bottom rests on the fabric.
- Support baby close and position his legs into a deep squat for optimal hip support & development.
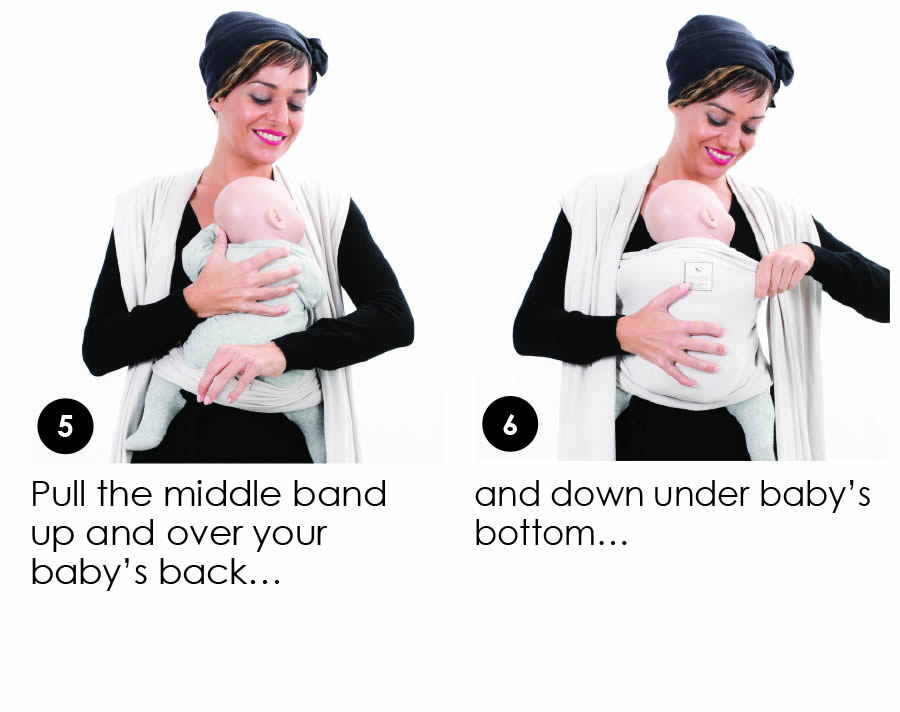
- Pull the middle band up and over your baby's back...
- and down under baby's bottom...
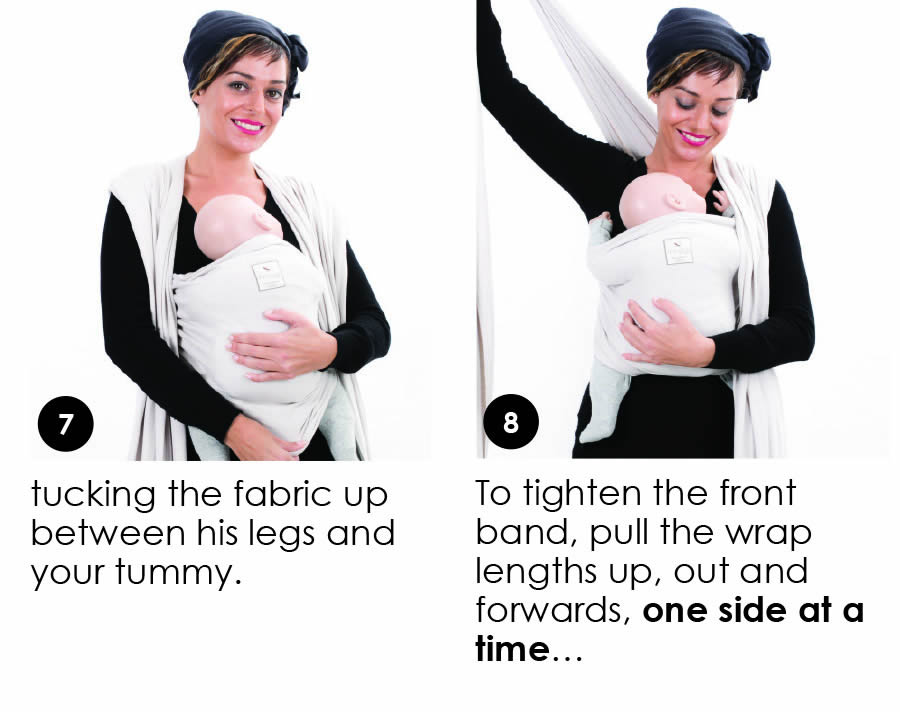
- tucking the fabric up between his legs and your tummy.
- To tighten the front band, pull the wrap lengths up, out and forwards, one side at a time...
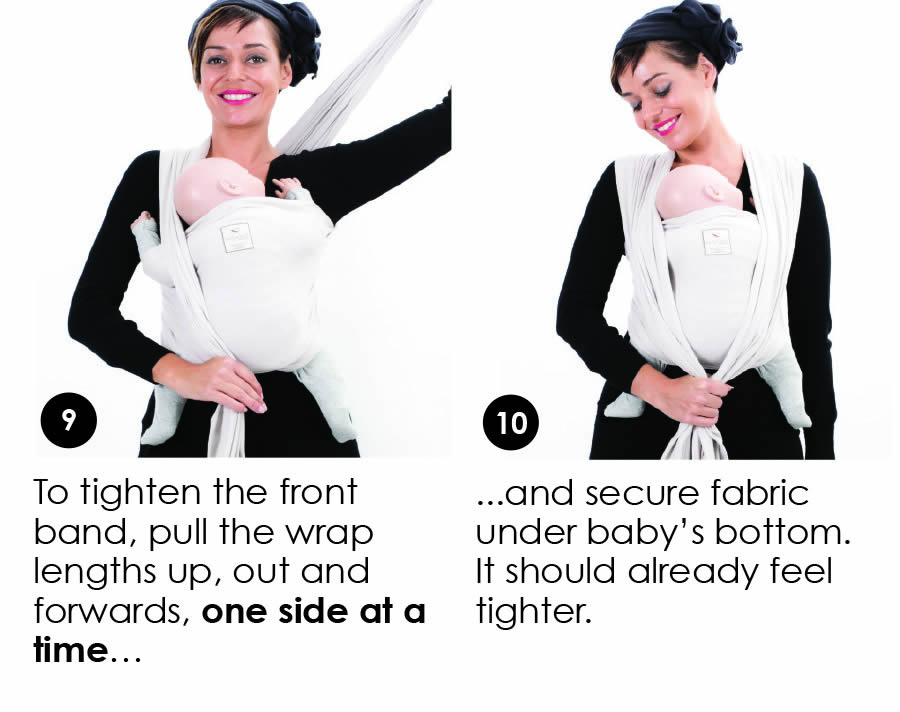
- To tighten the front band, pull the wrap lengths up, out and forwards, one side at a time...
- ...and secure fabric under baby's bottom. It should already feel tighter.
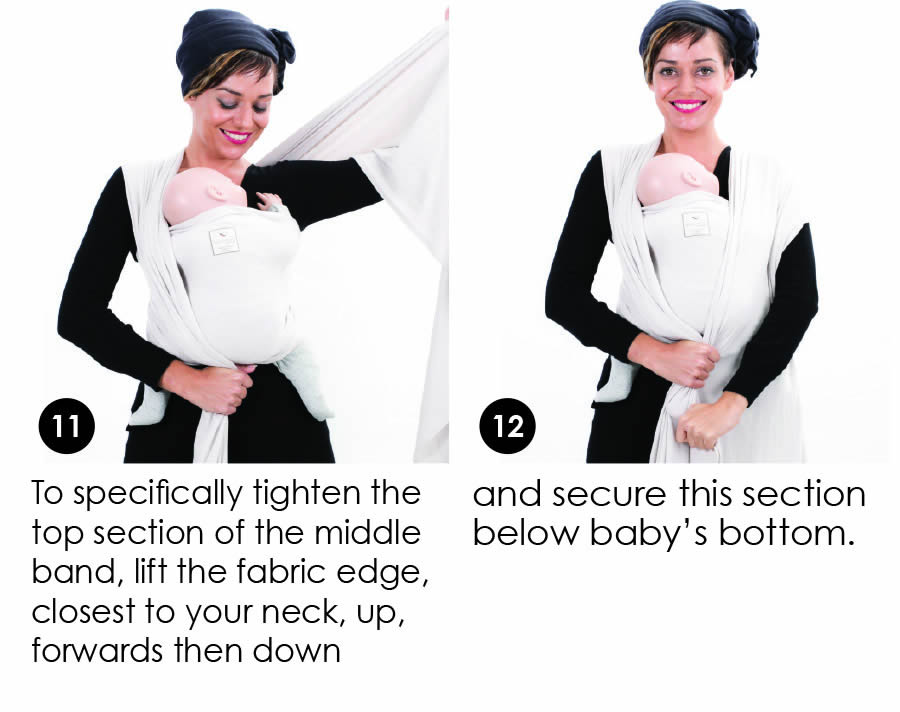
- To specifically tighten the top section of the middle band, lift the fabric edge, closest to your neck, up, forwards then down
- and secure this section below baby's bottom.
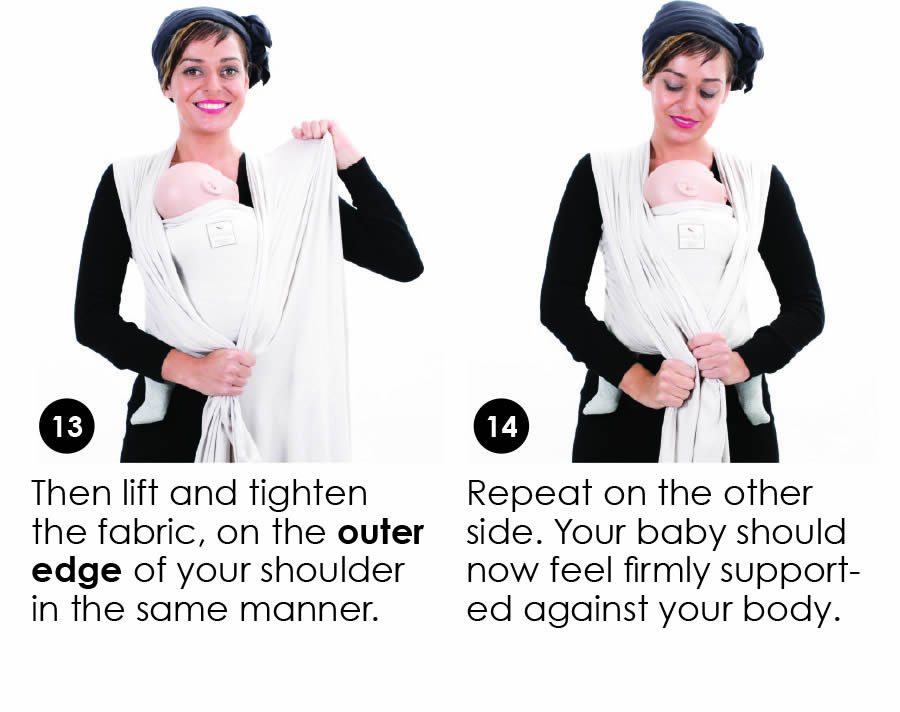
- Then lift and tighten the fabric, on the outer edge of your shoulder in the same manner.
- Repeat on the other side. Your baby should now feel firmly support- ed against your body.
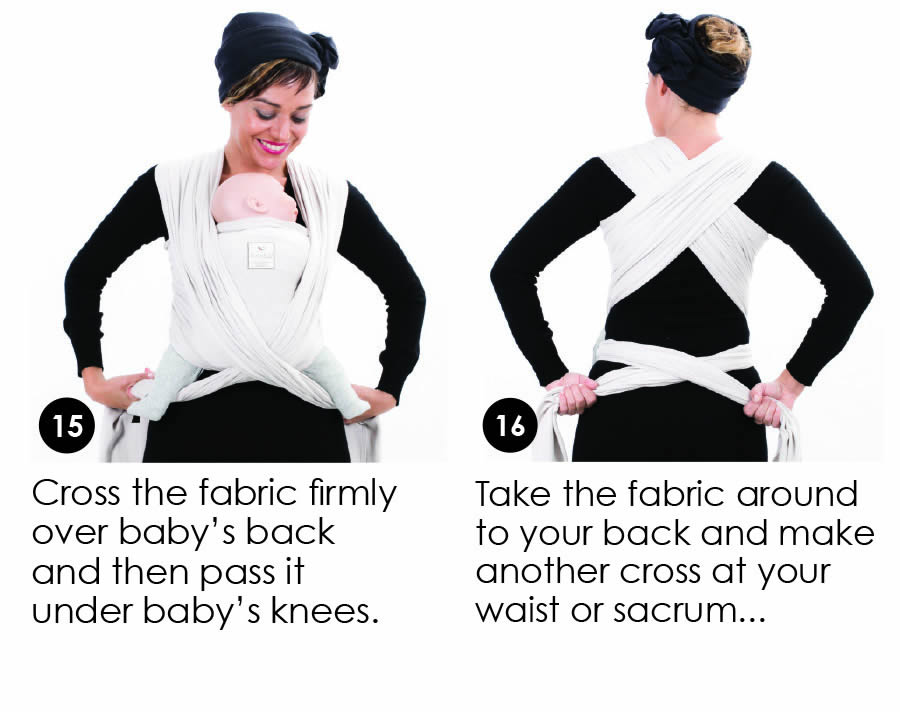
- Cross the fabric firmly over baby's back and then pass it under baby's knees.
- Take the fabric around to your back and make another cross at your waist or sacrum...
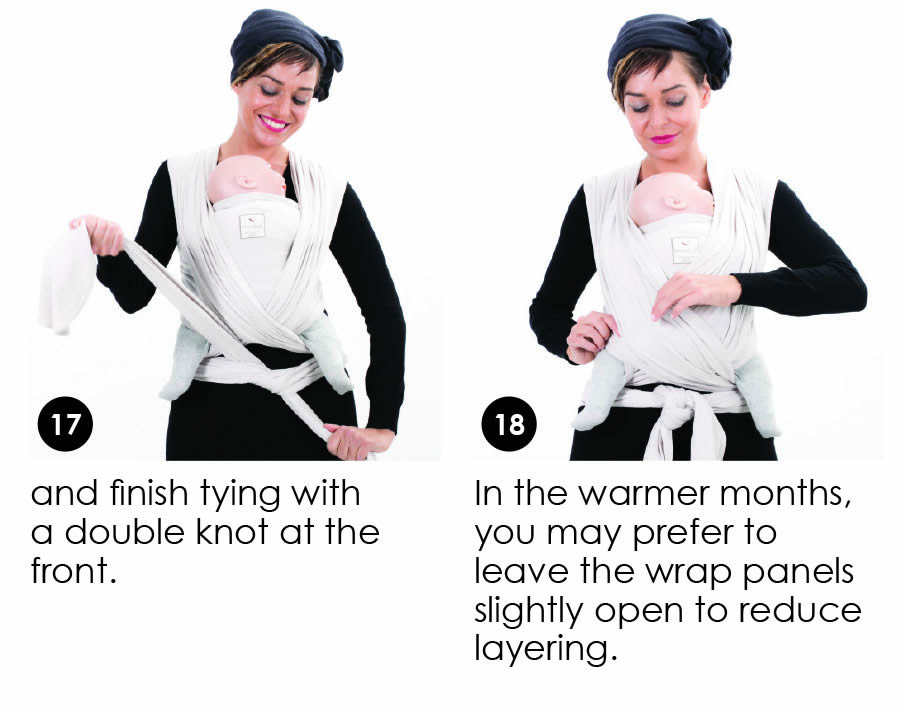
- and finish tying with a double knot at the front.
- In the warmer months, you may prefer to leave the wrap panels slightly open to reduce layering.
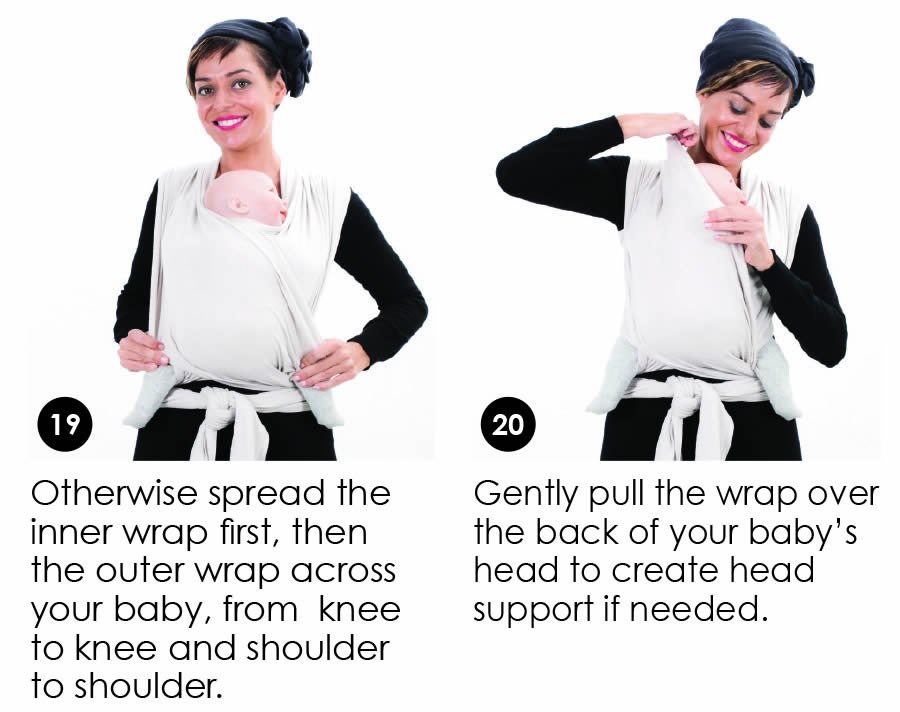
- Otherwise spread the inner wrap first, then the outer wrap across your baby, from knee to knee and shoulder to shoulder.
- Gently pull the wrap over the back of your baby's head to create head support if needed.


